Curbless Walk-In Shower Engineering: Waterproofing Systems, Linear Drains & Slope Ratios
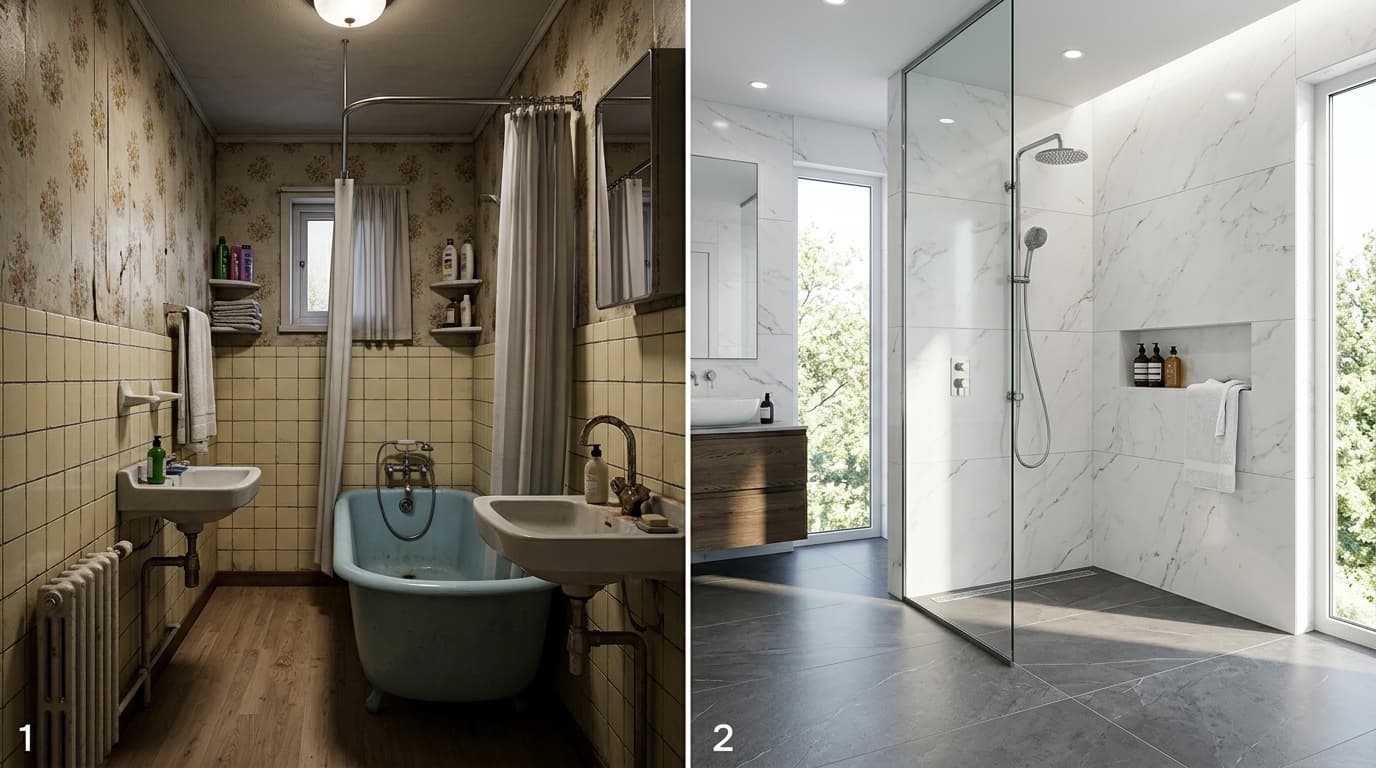
Architectural blueprints for zero-threshold barrier-free showers: subfloor recessing, uncoupling waterproofing membranes, linear drain placement, and large format tile.

| System Attribute | Sheet Membrane (Schluter-KERDI) | Liquid-Applied (Laticrete Hydro Ban) | Rigid XPS Foam Panels (Wedi System) |
|---|---|---|---|
| Vapor Permeance (ASTM E96) | 0.3 – 0.75 Perms (Standard) | 0.5 – 1.25 Perms (2 coats) | 0.15 – 0.30 Perms (Integral) |
| Thickness Consistency | 100% Factory Uniform (8 to 20 mils) | Manual Dependent (Mil gauge required) | Rigid 1/2" to 2" Structural Foam |
| Installation Speed | Moderate (Requires thin-set bedding) | Slow (Requires 2-coat cure time) | Rapid (Fastens directly to studs/joists) |
| Compressive Strength | Relies on underlying substrate | Relies on underlying substrate | 50 – 65 psi (High point-load rating) |
| Best Architectural Use | Large continuous floors & simple walls | Curved walls, complex niches, benches | Complete wet rooms & steam showers |
Executive Architectural & Engineering Overview: The Zero-Threshold Revolution
In high-performance contemporary residential design, the curbless (zero-threshold) walk-in shower has transcended its origins as an accessible Americans with Disabilities Act (ADA) utility to become the defining luxury aesthetic of the modern bathroom. By eliminating the traditional 4- to 6-inch raised shower curb, architects establish a continuous, unbroken floor plane that visually expands spatial volume, simplifies sightlines, and allows large-format porcelain slabs or natural stone to flow uninterrupted from the dry vanity zone directly into the wet envelope.
However, beneath this minimalist visual serenity lies one of the most mechanically demanding and high-risk assemblies in residential construction. Unlike a conventional curbed shower—where a physical dam provides a forgiving safety margin against overflow and waterproofing imperfections—a curbless shower relies entirely on gravitational hydraulic modeling, subfloor structural stiffness, microscopic slope geometry, and monolithic capillary sealing. In the absence of a raised curb, any failure in structural deflection, drain flow sizing, or membrane lapping will result in water migrating into living spaces, rotting structural joists, and creating subterranean mold colonies.
When executing a zero-threshold wet room in 2026, architects and master builders must evaluate the project across five interdependent engineering disciplines:
- Structural Substrate Deflection & Recessing: Modifying floor joist systems to achieve a recessed subfloor plane without violating International Residential Code (IRC) structural span tables, or alternatively utilizing bonded uncoupling elevation raises across the entire bathroom footprint.
- Hydraulic Flow Dynamics & Linear Drainage: Matching the drain channel length, throat geometry, and trap sizing to the maximum simultaneous Gallons Per Minute (GPM) discharge of multi-head thermostatic shower valves under peak dynamic pressure.
- Membrane Science & Vapor Impermeability: Selecting and detailing sheet-applied or liquid-applied bonded waterproof membranes adhering to ANSI A118.10 standards with ASTM E96 water vapor permeance ratings below 0.5 perms.
- Single-Plane Slope Geometries: Achieving a precise, continuous pitch of 1/4 inch per linear foot (2.08% grade) across large surface planes, eliminating the awkward compound envelope cuts required by traditional center drains.
- Capillary Breaks & Micro-Threshold Containment: Engineering physical capillary interruptions beneath the tile plane at the wet/dry transition to arrest horizontal water migration driven by surface tension through thin-set mortar beds.
In zero-threshold shower design, water does not respect visual intentions. Water responds exclusively to gravitational potential, capillary draw, and air pressure differentials. The true elegance of a curbless bathroom is measured by what remains invisible beneath the stone.
Lifecycle analysis proves that a properly engineered curbless shower delivers decades of maintenance-free performance. By eliminating grout-packed mortar beds and problematic curb corners—the primary failure zones where topical caulks degrade—a bonded monolithic sheet membrane system creates an impermeable, rot-proof subterranean basin that protects the structural integrity of the home indefinitely.
---
Structural Substrate Engineering: Joist Recessing vs. Floor Elevation Raising
The primary structural hurdle in curbless shower construction is establishing the necessary vertical drop to accommodate the shower slope and drainage throat without creating a tripping hazard at the bathroom entrance. In standard residential wood-framed construction, achieving a flush threshold requires lowering the shower substrate by 1.5 to 2.5 inches relative to the finished bathroom floor.
Method 1: Structural Joist Notching and Sistering (Down-Framing)
Lowering the subfloor within the wet zone requires modifying the dimensional lumber joists or engineered I-joists beneath the shower. However, haphazardly cutting into floor joists is a direct violation of International Residential Code (IRC Section R502.8) and can cause catastrophic structural deflection:
- IRC Cutting & Notching Restrictions: In conventional dimensional lumber (2x10 or 2x12 joists), notches in the outer thirds of the span cannot exceed one-sixth of the joist depth, and notches are strictly prohibited in the middle third of the span where bending moments are highest.
- Engineered Sistering Protocol: To safely lower the subfloor, the master framing carpenter must install full-length engineered LVL (Laminated Veneer Lumber) or dimensional joists directly alongside the existing joists. These sistered members are secured using structural polyurethane adhesive and structural framing screws (such as Simpson Strong-Tie SDWS) staggered every 6 inches on center.
- Ledger & Infill Construction: Continuous 2x4 structural ledgers are glued and fastened to the bottom inside edges of the sistered joists. Nominal 3/4-inch marine-grade CDX plywood or tongue-and-groove OSB subfloor panels are then inset between the joists, resting directly on the ledgers. This creates a recessed subfloor pocket recessed 1.5 to 2 inches below the adjacent dry subfloor while preserving an aggregate floor stiffness exceeding L/720 deflection criteria.
Method 2: Whole-Room Elevation Ramping (Subfloor Preservation)
In historic restorations, timber-frame homes, or post-tensioned concrete condominiums where cutting or lowering joists is structurally impossible, architects utilize whole-room elevation transitions:
- Rather than dropping the shower floor, the installer builds up the subfloor across the entire dry bathroom area using high-density lightweight foam uncoupling boards (such as Schluter-DITRA-HEAT or Wedi building panels) or engineered self-leveling cementitious underlayments.
- The slope begins at the bathroom entrance doorway, incorporating an ADA-compliant subtle 1:12 ramp (less than a 1/2-inch rise over 6 feet), making the transition imperceptible to occupants while completely preserving structural framing integrity.
+-------------------------------------------------------------------------+
|                  STRUCTURAL DOWN-FRAMING PROFILE (METHOD 1)             |
+-------------------------------------------------------------------------+
   [Dry Zone Finished Floor]                    [Curbless Wet Zone]
        │ (Unbroken Plane)                               │
        ▼                                                ▼
  ┌──────────────┐                             ┌─────────────────────────┐
  │ Finished Tile│                             │ Single-Plane Sloped Tile│
  ├──────────────┤                             ├─────────────────────────┤
  │ Uncoupling   │                             │ Bonded Sheet Membrane   │
  ├──────────────┤                             ├─────────────────────────┤
  │ 3/4" Subfloor│                             │ Pre-Sloped Foam Tray    │
  ├──────────────┴───────────────┐             ├─────────────────────────┤
  │ Full-Height Joist (Dry Zone) │             │ Inset 3/4" Subfloor     │
  │                              │             ├─────────────────────────┤
  │                              │◄──(Sister)──┤ 2x4 Structural Ledger   │
  │                              │             │ (Lowered 2" on Sister)  │
  └──────────────────────────────┘             └─────────────────────────┘
+-------------------------------------------------------------------------+
Subfloor Deflection Tolerances (TCNA Requirements)
Under Tile Council of North America (TCNA) guidelines, natural stone installations require a minimum floor deflection rating of L/720 (total span in inches divided by 720 under full design dead and live load). Large-format porcelain tiles (edges exceeding 15 inches) require L/360 minimum, though luxury specifications enforce L/540. If the subfloor flexes more than 1/16 inch under walking load, brittle stone slabs and mortar bonds will shear, tearing the underlying waterproofing membrane and triggering unrepairable leaks.
---
Hydraulic Modeling & Linear Drainage Mechanics
In a curbless shower, the drain is not merely a passive hole; it is a precision hydraulic evacuation system that must balance gravity, surface friction, and water volume.
Flow Rate Sizing (GPM Sizing Math)
A single standard showerhead discharges between 1.8 and 2.5 Gallons Per Minute (GPM). However, luxury master showers frequently feature multiple fixtures operating concurrently:
- Overhead Rain Showerhead (12" to 16"): 2.5 GPM
- Dual Wall-Mounted Body Sprays (4 units @ 1.5 GPM): 6.0 GPM
- Handheld Spray Wand: 2.0 GPM
- Total Peak Hydraulic Discharge: 10.5 GPM
Under the Uniform Plumbing Code (UPC) and International Plumbing Code (IPC Section 417.4), a standard 2-inch residential shower drain pipe flowing under gravity has a maximum effective drainage capacity of approximately 5 to 6 GPM. If a luxury shower discharging 10.5 GPM is connected to a standard 2-inch drain outlet, the shower pan will back up at a rate of 4.5 to 5.5 gallons per minute. In a curbless configuration, water will spill across the bathroom within 90 seconds.
Dual Drains & 3-Inch Waste Lines
To evacuate high-flow multi-head systems:
- Plumbers must upgrade the rough-in waste line beneath the slab or joists to a 3-inch PVC or cast-iron pipe, which handles up to 12 to 14 GPM under gravity.
- Alternatively, architects specify Dual-Outlet Linear Drains, featuring two independent 2-inch waste drops feeding into the main drain manifold, doubling flow capacity.
Drain Placement: Wall-Flush vs. Threshold-Flush
The spatial orientation of the linear drain dictates the room's entire slope geometry and waterproofing detailing:
| Drain Location | Hydraulic & Aesthetic Advantages | Engineering Challenges & Vulnerabilities | |---|---|---| | Rear Wall-Flush (Opposite Entry) | Highest Safety Margin: Water flows continuously away from the dry bathroom. Users never stand directly on the drain grate. Accommodates a single continuous slope plane toward the back wall. | Demands framing studs to be perfectly plumb; waste line must be cored close to wall plates, requiring careful joist headering. | | Threshold-Flush (At Shower Entry) | Eliminates water pooling near rear walls; acts as an immediate hydraulic trench barrier preventing water from entering the dry zone. | Users must step over or stand on the grate upon entering; requires a hair-strainer basket cleaned weekly to avoid immediate threshold overflow. | | Side Wall-Flush | Ideal for narrow, elongated walk-in wet rooms; allows large-format tile to run perpendicular to the wall. | Requires long horizontal pipe runs to reach main soil stack; can create uneven vertical tile reveal lines at corners if slope is steep. |
---
Waterproofing Chemistry: Sheet Membranes vs. Liquid-Applied vs. Pre-Formed Foam
The integrity of a curbless wet room depends entirely on the chemical and mechanical properties of the primary waterproofing envelope. Traditional three-piece clamping ring drains with unbonded PVC pan liners and thick gravel-packed sand-cement mortar beds are fundamentally obsolete in modern zero-threshold architecture. Contemporary wet rooms rely on Bonded Waterproofing Membranes (BWM) applied directly beneath the tile thin-set.
1. Sheet-Applied Polyethylene Membranes (Schluter-KERDI, Prova-Mat)
Composed of an extruded core of soft polyethylene (PE) laminated on both sides with non-woven polypropylene fleece webbing to anchor mechanically into polymer-modified or unmodified cementitious thin-set mortars:
- Thickness & Permeability: Standard sheet membranes measure between 0.2mm and 0.5mm (8 to 20 mils) thick, delivering a water vapor permeance rating of 0.3 to 0.75 perms (ASTM E96 Procedure E). In continuous steam environments, specialized high-density vapor retarder membranes (such as Kerdi-DS with 0.18 perms) are required.
- Factory Uniformity: Unlike liquid coatings that rely on manual roller pressure, sheet membranes guarantee a factory-calibrated, uniform dry-film thickness across 100% of the shower pan and vertical walls.
- Seam Sealing: All sheet overlaps must maintain a minimum 2-inch (50mm) overlap bonded with thin-set mortar or sealed with specialized elastomeric polyurethane sealing adhesive (such as Kerdi-FIX).
2. Liquid-Applied Elastomeric Membranes (Laticrete HYDRO BAN, Custom RedGard)
Liquid rubber or acrylic polymers containing elastomeric latex and cross-linking synthetic resins that cure upon atmospheric exposure:
- Application Method: Applied using a heavy-nap roller, paintbrush, or airless paint sprayer in two distinct coats at right angles to one another.
- Dry Film Thickness (DFT) Verification: To achieve ANSI A118.10 compliance, liquid membranes must achieve a continuous minimum dry film thickness of 20 to 30 mils (requiring wet film thickness monitoring via a plastic mil comb gauge). If applied too thin, micro-pinholes permit capillary moisture transit.
- Seamless Geometry: Liquid membranes excel on complex curved architectural walls, built-in shampoo niches, floating bench seats, and around complicated linear drain flanges where folding sheet membranes creates bulky corner buildup.
3. Pre-Sloped High-Density EPS/XPS Foam Trays (Wedi, Schluter-KERDI-SHOWER-L)
Manufactured from expanded polystyrene (EPS) or extruded closed-cell polystyrene (XPS) coated with mineral mortar and fiberglass reinforcement mesh:
- Integral Precision Pitch: Pre-formed trays eliminate human screeding errors by delivering a factory-machined, exact 1/4" per foot single-plane pitch engineered specifically to match the linear drain channel.
- Compressive Strength: High-end trays provide a compressive strength rating exceeding 50 to 60 psi, capable of bearing heavy point loads from freestanding stone soaking tubs and wheelchair castors without substrate compression.
---
Slope Mechanics & Single-Plane Geometry
The geometry of water movement across tile surfaces is governed by gravitational velocity versus surface tension. A slope that is too shallow allows water to pool in puddles, while a slope that is too steep creates awkward floor transitions and furniture tipping.
The 1/4" Per Foot Rule (TCNA B421 / B422)
The standard specification across all residential model codes (IRC Section P2709.3) mandates that shower floors slope toward the drain at a minimum of 1/4 inch per horizontal foot (2.08% slope) and a maximum of 1/2 inch per horizontal foot (4.16% slope).
- On a walk-in shower with a 5-foot (60-inch) distance from the entrance threshold to the rear linear drain, the total elevation drop is exactly:
$$ ext{Drop} = 5 ext{ ft} imes 0.25 ext{ in/ft} = 1.25 ext{ inches}$$
- This 1.25-inch drop establishes a gentle, safe incline that ensures rapid water evacuation while remaining completely comfortable underfoot.
Single-Plane vs. Compound Envelope Slopes
Traditional center point drains require a Compound Four-Plane (Pyramidal) Slope, forcing installers to pitch all four corners of the room inward toward a central point. When installing large-format porcelain tiles (e.g., 24"x48" or 48"x48"), compound slopes are impossible without diagonally scoring and cutting every single tile (envelope cuts), creating an unsightly spiderweb of jagged grout lines.
In contrast, a linear drain running full-width along the back wall utilizes a Single-Plane Slope:
- The entire floor acts as a single flat inclined ramp.
- Large-format porcelain tiles and bookmatched stone slabs can be laid whole without a single relief cut.
- Grout joints remain parallel and orthogonal to the walls, achieving pure minimalist architectural serenity.
+-------------------------------------------------------------------------+
|                SLOPE GEOMETRY COMPARISON (TOP-DOWN VIEW)                |
+-------------------------------------------------------------------------+
    TRADITIONAL CENTER DRAIN                  CONTEMPORARY LINEAR DRAIN
     (Compound 4-Way Slope)                     (Single Continuous Plane)
  ┌──────────────┬──────────────┐         ┌─────────────────────────────┐
  │  \        /  │  \        /  │         │ ▲                         ▲ │
  │    \    /    │    \    /    │         │ │ Continuous 1/4" Pitch   │ │
  │      \       │       /      │         │ │ Evacuates Straight Back │ │
  │────── [DRAIN] ──────│         │ │                         │ │
  │      /       │       \      │         │ │ Large-Format Tiles      │ │
  │    /    \    │    /    \    │         │ │ Run Unbroken (No Cuts)  │ │
  │  /        \  │  /        \  │         │ ▼                         ▼ │
  └──────────────┴──────────────┘         ├─────────────────────────────┤
  *Requires diagonal envelope cuts*        │ [FULL-WIDTH LINEAR DRAIN]   │
  *Tiles must be small mosaic size*        └─────────────────────────────┘
+-------------------------------------------------------------------------+
---
Capillary Action & Micro-Threshold Detailing
The most elusive and destructive failure in curbless shower construction is Capillary Moisture Tracking. Many general contractors mistakenly believe that if the shower floor slopes away from the dry bathroom, water can never travel into the dry zone. This assumption violates the physics of fluid dynamics.
The Physics of Capillary Migration
When shower water lands on unsealed grout lines or micro-fissures in tile installations, it penetrates into the underlying cementitious thin-set mortar bed. Even though the surface of the tile is pitched toward the drain, water inside the porous thin-set moves through capillary action—the intermolecular attractive forces between liquid and solid surfaces that draw moisture horizontally through microscopic voids regardless of gravitational pitch.
Over several weeks of daily shower use, moisture travels outward beneath the tile, crossing the invisible boundary between the wet shower and the dry vanity zone. Once past the shower entrance, the water encounters standard un-waterproofed drywall, wood vanity toe-kicks, and hardwood floor transitions, causing wood rot, floor cupping, and fungal efflorescence.
Engineering the Capillary Break
To eliminate capillary tracking, master installers execute a physical, subterranean barrier at the transition datum:
- The Membrane Turn-Up / Waterstop: The bonded waterproofing membrane from the shower floor must extend at least 3 to 6 feet out into the dry bathroom area, or ideally across the entire bathroom floor (turning the entire space into a true wet room).
- Mechanical Solid Sill Barrier: At the precise threshold line, install a continuous solid aluminum, brass, or stainless steel L-profile (such as Schluter-SCHIENE or DILEX) embedded in elastomeric polyurethane sealant (Sikaflex or Kerdi-FIX).
- Mortar Interruption: The thin-set mortar bed must be physically sliced and discontinued at this metal profile. This creates an air gap and physical impermeable dam that halts horizontal water transit. The joint between the wet and dry tile is then filled with 100% silicone sealant (ASTM C920 compliant) rather than porous cement grout.
---
Itemized Cost Schedule & Regional Labor Breakdown
Building an architectural-grade curbless walk-in shower requires specialized structural, plumbing, and tile craftsmanship. The table below outlines the true itemized capital investment for an expansive 6-foot by 5-foot (30 sq. ft.) zero-threshold wet room shower.
Comprehensive 2026 Budget Breakdown ($21,500 Total Project Baseline)
| Trade Scope / Component | Premium Materials & Hardware | Specialized Trade Labor | Total Itemized Cost | % of Budget | |---|---|---|---|---| | Demolition & Structural Down-Framing | $650 (LVL sistering lumber, Simpson hardware, 3/4" subfloor) | $2,200 (Framing carpenters cutting joists, sistering, laser leveling) | $2,850 | 13.3% | | Plumbing Relocation & 3" Drain Rough-In | $950 (3" PVC piping, fittings, PEX-a homerun valve lines) | $2,600 (Master Plumber roughing drain line, core drilling, venting) | $3,550 | 16.5% | | Architectural Linear Drain Assembly | $1,200 (Infinity Drain / QuickDrain 60" 316-grade stainless channel) | $650 (Precision drain flange leveling and clamping) | $1,850 | 8.6% | | Waterproofing Membrane & Slope Bed | $1,400 (Wedi/Schluter sheet system, pre-sloped tray, sealants) | $2,400 (Certified tile setter membrane application, flood test) | $3,800 | 17.7% | | Large-Format Stone/Tile & Setting Mortars | $2,800 (Porcelain slabs or honed marble, epoxy grout, LFT thinset) | $3,600 (Precision waterjet cuts, mitered niches, lippage tuning) | $6,400 | 29.8% | | Custom 1/2" Frameless Architectural Glass | $2,400 (1/2" low-iron Starphire tempered glass, brass clips) | $650 (Glass glazing mechanics laser measuring and installation) | $3,050 | 14.2% | | TOTALS | $9,400 | $12,100 | $21,500 | 100.0% |
Regional Cost Adjustments
- San Francisco / New York / Seattle / Los Angeles Metro: Multiply labor by 1.35x to 1.50x ($25,500 – $28,000 total).
- Chicago / Denver / Boston / Austin Metro: Multiply labor by 1.15x to 1.25x ($23,000 – $24,500 total).
- Southeast / Midwest Non-Metro: Multiply labor by 0.85x to 0.95x ($18,500 – $20,000 total).
---
Step-by-Step Construction Protocol: The 5-Phase Installation Sequence
Executing a curbless walk-in shower requires rigorous chronological discipline. A single sequencing error can compromise the subterranean waterproofing envelope.
Phase 1: Structural Diagnostics & Subfloor Lowering
- Laser Surveying & Joist Mapping: Strip floor down to bare joists. Inspect spacing (16" on center standard, 12" on center preferred). Calculate joist span and dead load capacity.
- Sistering & Insetting: Clamp and thru-bolt 2x10 engineered LVLs alongside each joist. Fasten 2x4 ledgers along the bottom inner edge. Inset 3/4-inch marine-grade exterior-glued plywood subfloor flush with ledgers. Ensure all subfloor edges have solid blocking beneath seams.
- Fastening & Deflection Check: Screw subflooring every 6 inches on center using structural wood screws. Verify that subfloor deflection does not exceed L/720 under point loading.
Phase 2: Plumbing Rough-In & Drain Core Setting
- Drain Waste Line Extension: Route a 2-inch or 3-inch PVC drain drop directly beneath the target linear drain channel location. Secure the P-trap with rigid pipe hangers to prevent pipe sagging under water weight.
- Linear Drain Flange Assembly: Install the heavy-gauge 316-grade stainless steel linear drain body. Use a digital torpedo level to ensure the drain body is laser-level along its entire length. Connect the drain throat to the waste line using an approved solvent weld or mechanical no-hub coupling.
- Plumbing Rough Pressure Testing: Cap the drain and pressurize the supply lines to 80 psi for 24 hours to verify zero plumbing rough leaks prior to substrate enclosure.
Phase 3: Mortar Screeding & Monolithic Waterproofing
- Pre-Sloped Substrate Installation: Install a high-density pre-sloped foam tray or pack an engineered sand-cement mud bed (4:1 sand-to-Portland cement ratio) pitched exactly 1/4" per foot toward the linear drain.
- Sheet Membrane Installation: Apply ANSI A118.4 modified thin-set using a 1/4" x 3/16" V-notch trowel. Embed the waterproof sheet membrane (Schluter-KERDI or equivalent), burnishing it with a smooth float to expel all trapped air pockets.
- Detailing Flanges & Corners: Overlap all sheet transitions by a minimum of 2 inches. Apply prefabricated inside and outside corner patches. Bond the sheet membrane directly to the linear drain's integrated stainless bonding flange using rapid-setting hybrid polyurethane adhesive (Kerdi-FIX or Laticrete 9235).
- Mandatory 24-Hour Hydrostatic Flood Test: Plug the drain throat with an inflatable pneumatic test ball. Fill the entire shower basin with water up to a depth of 2 inches (holding water at the threshold with a temporary clay or wooden dam). Mark the water line with a pencil. Leave undisturbed for 24 hours. The municipal plumbing inspector must verify zero water level drop before tile setting commences.
Phase 4: Precision Tile Setting & Grout Systems
- Dry-Laying & Laser Alignment: Project vertical and horizontal laser datum lines across the walls and floor. Dry-lay tiles to ensure no awkward slivers (under 3 inches) occur at visible perimeter margins.
- Thin-Set Mortar Application: Use an ANSI A118.15 super-polymer modified mortar (such as Laticrete 254 Platinum or Ardex X77). Directionally trowel the mortar in straight parallel lines perpendicular to the drain, and back-butter 100% of each tile back to achieve minimum 95% mortar coverage (mandatory under TCNA wet area rules).
- Lippage Tuning: Use a mechanical tile leveling clip system (e.g., Raimondi or Tuscan) to lock adjacent tile corners into exact planar alignment, eliminating lippage (height variation between adjacent tiles cannot exceed 1/32").
- Epoxy Grouting: Grout all floor joints with 100% solids epoxy grout (ANSI A118.3, such as Laticrete SPECTRALOCK PRO Premium). Epoxy grout is completely non-porous, waterproof, chemically inert, and permanently eliminates mildew staining without requiring annual chemical sealers.
Phase 5: Enclosure Glazing & Commissioning
- Digital Laser Glass Templating: Once tile is fully grouted, the glazier uses laser trackers to capture the exact out-of-square wall and floor profile for custom 1/2-inch Starphire ultra-clear tempered glass panels.
- Mechanical Glass Mounting: Fasten glass panels using solid brass or stainless steel mechanical clamps anchored into solid wood backing studs behind the tile (never rely solely on drywall plastic anchors).
- Sanitary Silicone Caulking: Seal all internal plane changes (floor-to-wall and wall-to-wall transitions) with 100% neutral-cure sanitary silicone caulk (ASTM C920). Never use rigid grout in corner joints.
- Hydraulic Commissioning: Run all showerheads, body sprays, and wands simultaneously at maximum flow for 15 minutes. Verify that water flows smoothly into the linear drain channel without any peripheral puddle accumulation or threshold splashing.
---
Forensic Failure Analysis: Five Critical Curbless Shower Defects
When zero-threshold showers fail, the consequences are structurally catastrophic. The table below details the five most common forensic failures investigated by building envelope specialists.
1. Membrane Perforation from Mechanical Fasteners
- Physical Manifestation: Water dripping into ceilings below within 3 months of occupancy; rotted subfloor around shower periphery.
- Root Forensic Cause: Glass installers or finish carpenters drilling screws for shower door bottom tracks or baseboards directly through the floor tile and puncturing the underlying waterproof membrane.
- Mandatory Preventative Engineering: Enforce a strict "No Floor Fastener" zone. Fixed glass panels must be secured via vertical wall clamps and silicone floor adhesion, or set into a recessed aluminum U-channel embedded during the tile installation before waterproofing is detailed.
2. Capillary Tracking Beyond the Shower Perimeter
- Physical Manifestation: Hardwood floors warping, cupping, or turning black in the adjacent bedroom; peeling baseboard paint outside the bathroom door.
- Root Forensic Cause: Thin-set mortar bed laid continuously across the shower threshold without an engineered capillary break, allowing trapped water to migrate horizontally through wick action.
- Mandatory Preventative Engineering: Install a full-width metal Schluter profile at the wet/dry threshold bedded in polyurethane adhesive, break the thin-set mortar completely, and seal the transition seam with 100% elastomeric silicone caulk.
3. Drain Flange Debonding and Shearing
- Physical Manifestation: Subfloor saturated directly around the linear drain body; floor tile immediately adjacent to the drain cracking or sounding hollow when tapped.
- Root Forensic Cause: Installing a linear drain body supported only by expanding foam or loose mortar, causing the drain to flex under occupant foot traffic. This differential movement tears the sheet membrane away from the bonding flange.
- Mandatory Preventative Engineering: Mechanically screw the linear drain body to solid structural lumber blocking beneath the subfloor. Use only manufacturer-certified elastomeric hybrid adhesives to seal membranes to stainless flanges.
4. Thin-Set Void Moisture Pockets & Grout Efflorescence
- Physical Manifestation: Chalky white crystalline deposits accumulating on grout lines; dark wet spots on tile that refuse to dry even days after shower use.
- Root Forensic Cause: Troweling mortar in swirl patterns and failing to back-butter tiles, creating enclosed air pockets beneath the tile. Water fills these voids, dissolves calcium hydroxide within the Portland cement, and transports it to the surface as efflorescence.
- Mandatory Preventative Engineering: Trowel thin-set mortar strictly in straight, parallel ridges using a directional notch trowel; back-butter all tiles 100%; use 100% solids epoxy grout.
5. Inadequate Drain Flow Capacity Overflow
- Physical Manifestation: Water pooling over the linear drain grate and slowly creeping across the bathroom floor toward the entry door during 10-minute showers.
- Root Forensic Cause: Installing an 8 to 10 GPM multi-head shower valve system with a single 2-inch drain outlet, or positioning a linear drain with an undersized internal catchment trough that chokes under soapy water foam.
- Mandatory Preventative Engineering: Size rough-in waste lines to 3 inches for multi-fixture showers; choose linear drains with deep-profile V-channels; clean internal stainless hair-catchers on a weekly maintenance schedule.
---
Real-World Architectural Case Studies
Case Study 1: The High-Rise Concrete Penthouse — Miami, Florida
- Architectural Scope: Installing an expansive 70 sq. ft. curbless wet room with an integrated freestanding solid surface soaking tub and dual rain-head systems on the 32nd floor of a luxury oceanfront tower.
- Engineering Challenges: Post-tensioned 8-inch solid concrete floor slabs prohibited any saw-cutting, notching, or core-drilling into the slab to lower the shower pan. Core-drilling without GPR (Ground Penetrating Radar) risked severing post-tension cables, causing structural slab failure.
- Applied Solutions:
- *Subfloor Elevation Infill*: Built up the entire 220 sq. ft. bathroom dry zone with 1.5 inches of high-density extruded polystyrene Wedi boards, matching the elevation of the sloped shower tray.
- *Low-Profile Side-Outlet Linear Drain*: Specified a specialized 1.5-inch ultra-low profile linear drain featuring an integrated horizontal side-exit waste outlet, connecting into the existing single 2-inch core sleeve without requiring new concrete drilling.
- *Fluid Membrane Application*: Applied three coats of Laticrete HYDRO BAN liquid-applied waterproofing across the entire 220 sq. ft. bathroom floor, running 6 inches up every wall, transforming the entire space into a monolithic waterproof room.
- Financial Tally: Total Project Expenditure: $34,500. Concrete GPR Scanning & Drain Engineering: $4,800; Wedi Subfloor Build-Up: $5,200; Linear Drain & Fixtures: $6,500; Large-Format 5ft x 10ft Porcelain Slabs & Setting: $14,200; Custom Glass: $3,800.
Case Study 2: The Historic Farmhouse Master Suite — Greenwich, Connecticut
- Architectural Scope: Retrofitting an authentic 1910 timber-frame estate with a modern zero-threshold curbless shower and integrated steam generator system.
- Engineering Challenges: 110-year-old rough-sawn 2x8 true-dimension floor joists with significant natural bounce (deflection L/280) and out-of-level conditions (1.75-inch drop across the room footprint).
- Applied Solutions:
- *Structural Sistering & Steel Flitch Plates*: Bolted 1/4-inch structural steel flitch plates sandwiched between new engineered 2x8 LVLs alongside the historic timber joists, stiffening the floor to an exceptional L/950 deflection rating.
- *Rear Wall Linear Drain*: Positioned a 60-inch full-width Infinity Drain with a Tile-In top grate along the exterior wall, utilizing a single continuous slope pitched at 1/4" per foot away from the door.
- *Vapor-Retarder Envelope*: Because the unit incorporated a steam generator, the entire wet room was wrapped in Schluter-KERDI-DS (0.18 perms vapor impermeability) including the ceiling, which was pitched 2 inches per foot to prevent condensed steam droplets from raining on occupants.
- Financial Tally: Total Project Expenditure: $28,900. Structural Flitch Plate Framing: $7,200; Steam Generator & Plumbing: $6,100; Waterproofing & Tile: $11,400; Frameless Enclosure: $4,200.
---
Architectural Specification Guide: Master Division Standards
Architects specifying curbless wet rooms enforce strict adherence to MasterFormat Divisions 09 and 22:
Division 09 30 00 — Ceramic & Stone Tiling
- Substrate Deflection: Subfloor assembly must not exceed L/720 for natural stone or L/360 for porcelain under combined dead and live load, verified via laser metrology.
- Waterproofing Membrane: Bonded sheet membrane conforming to ANSI A118.10 and ASTM E96 (Procedure E, perm rating < 0.5 perms).
- Setting Mortar: Premium modified dry-set mortar meeting ANSI A118.15. Minimum 95% mortar contact coverage verified by periodic tile pull-testing during installation.
- Grouting: 100% solids epoxy grout conforming to ANSI A118.3 or high-performance cementitious grout meeting ANSI A118.7.
Division 22 40 00 — Plumbing Fixtures & Drains
- Linear Drain Body: Heavy-duty 316L marine-grade stainless steel with fully welded, electropolished trough body, adjustable height levelling feet, and integral mechanical bonding flange.
- Drain Throat: Minimum 2-inch internal diameter waste outlet for systems up to 6 GPM; 3-inch outlet for systems exceeding 6 GPM.
- Testing Standard: Complete system must successfully withstand an uninterrupted 24-hour hydrostatic flood test under 2 inches of standing water prior to tile application.
---
General Contractor Vetting & Contract Safeguards
Because curbless shower failures involve concealed moisture inside structural framing, vetting the installing contractor demands zero compromise.
Contractor Qualification Verification
- TCNA Certified Tile Installer (CTI): Verify that the tile contractor employs setters certified through the Ceramic Tile Education Foundation (CTEF). Certified installers have passed hands-on mock-up examinations testing ANSI and TCNA standards.
- Flood Test Guarantee in Contract: Require a formal contract clause specifying: "Contractor shall perform a mandatory 24-hour hydrostatic flood test witnessed and signed off by the homeowner or architect prior to the placement of any tile."
- Written Waterproofing Warranty: Demand a minimum 10-year comprehensive system warranty (offered by major manufacturers like Schluter, Wedi, or Laticrete when full system components—trays, membranes, sealants, and thin-sets—are installed by certified pros).
Contract Payment Milestones
- Milestone 1: Subfloor Down-Framing & Sistering Verified Flat (L/720 Deflection): 20%
- Milestone 2: Plumbing Rough-In & Drain Body Fastened: 20%
- Milestone 3: Waterproofing Membrane Installed & 24-Hour Flood Test Passed: 30%
- Milestone 4: Tile Setting, Grouting & Glass Installation: 20%
- Milestone 5: Final Punch-List, Flow Commissioning & Warranty Handover: 10%
---
Frequently Asked Questions (Technical & Code)
1. Does a curbless walk-in shower cause water to splash into the dry bathroom?
When properly engineered, no. Water containment in a zero-threshold shower is governed by three factors: adequate floor slope (1/4" per foot minimum), drain location (positioning the linear drain along the rear wall draws water away from the entry), and shower depth. An open, doorless walk-in shower requires a minimum depth of 5 to 6 feet from the showerhead to the entrance threshold to contain aerodynamic water droplet bounce. For showers shorter than 5 feet, a fixed frameless glass partition or a hinged glass door with an ultra-thin silicone drip sweep is recommended.
2. Can I install large-format 24"x48" porcelain tiles in a curbless shower?
Yes, but only if you specify a linear drain. Traditional center square or round drains require a four-way compound slope, which forces large-format tiles to be scored and cut into small triangles (envelope cuts) to follow the contour. Linear drains permit a single-plane slope—a flat, uniform ramp—allowing giant 24"x48", 36"x36", or even 5ft x 10ft porcelain slabs to be installed whole without cuts, maintaining sleek, uninterrupted sightlines.
3. What is the difference between Wedi foam boards and Schluter-KERDI sheet membrane?
Both are premium, TCNA-approved waterproofing solutions, but their application mechanics differ. Schluter-KERDI is a flexible polyethylene sheet membrane that must be adhered to drywall, cement board, or mortar using thin-set mortar, requiring meticulous attention to 2-inch seam overlaps. Wedi is a rigid extruded polystyrene (XPS) structural building board with an integrated waterproof cement coating on both sides; it acts as both the wall substrate and the waterproofing layer simultaneously, with seams sealed via proprietary polyurethane joint sealant. Wedi installs faster and eliminates thin-set cure times, though raw material costs are approximately 25% to 35% higher.
4. How does an inspector verify that a curbless shower doesn't leak before the tile is installed?
Municipal plumbing inspectors require a 24-Hour Hydrostatic Flood Test. The installer inserts an inflatable rubber test plug into the shower drain throat and fills the shower floor with water up to a depth of 2 inches (holding the water at the open curbless threshold with a temporary sealed clay or wooden barrier). The water sits undisturbed for 24 hours. The inspector checks for any drop in the water level or visible weeping beneath the joists. Only after passing the flood test is the contractor legally permitted to set tile.
5. Why is epoxy grout recommended over standard cementitious grout in curbless showers?
Standard cement grout is porous—it absorbs water like a hard sponge and relies on silicone chemical sealers that break down every 6 to 12 months. Over time, moisture seeps through cement grout into the thin-set bed, promoting black mold growth, mineral efflorescence, and unpleasant odors. Epoxy grout (such as Laticrete SPECTRALOCK) is a two-part resin system containing zero cement. It cures into an impermeable, stain-proof, chemical-resistant polymer with virtually zero water absorption, permanently protecting the tile assembly.
6. Can a curbless shower be installed on an existing concrete slab-on-grade foundation?
Yes, but it requires either saw-cutting and trenching the concrete slab or elevating the adjacent bathroom floor. To lower the shower floor, concrete cutting specialists saw-cut the perimeter of the shower zone, jackhammer out the 4-inch concrete slab, excavate the soil beneath, reroute plumbing, and pour a new recessed concrete pan. If cutting the slab is prohibited (as in post-tensioned slabs), the contractor builds up the surrounding bathroom floor using high-density uncoupling panels, creating an imperceptible ramped threshold at the bathroom door.
7. What is a capillary break and why is it mandatory at the shower threshold?
A capillary break is a physical interruption in the thin-set mortar bed at the boundary between the wet shower and the dry bathroom. Even when a shower floor slopes downward toward a drain, water inside the porous mortar bed can migrate backwards and sideways across the room through capillary draw (intermolecular wicking). Without an impermeable metal profile and silicone joint severing the mortar bed at the entrance, water will wick underneath the tile into the dry bathroom, rotting subfloors, warping hardwood floors, and causing drywall mold.
Frequently Asked Questions
Written by Julian Vance
Senior Architectural Designer & Principal EditorJulian holds a Master of Architecture (M.Arch) and brings over 14 years of experience specializing in luxury residential additions, historic preservation, and bespoke cabinetry ergonomics. He oversees architectural integrity and design analysis at Estatique.
Related Research in Kitchen & Bath
2026 Luxury Kitchen Remodeling Cost Guide: Custom Cabinetry, Exotic Stone & Layout Ergonomics
Detailed financial and architectural breakdown for luxury kitchen renovations: inset custom cabinets, quartzite slab costs, MEP relocation, and designer fees.
Quartzite vs. Engineered Quartz vs. Granite: Comprehensive Stone Durability & ROI Review
Authoritative mineralogical analysis of countertop materials: Mohs hardness, thermal shock thresholds, resin yellowing, acid etching, and fabrication pricing.
Master Bathroom Spa Architecture: Wet Room Layouts, Ergonomics & Plumbing Clearances
Design blueprint for master bath spa suites: European wet rooms, freestanding tub integration, dual vanity ergonomics, and acoustic wall decoupling.